MikroTik Hotspot Configuration in RouterOS 7
MikroTik Hotspot is an awesome service to run a captive portal network. You can run a public Wi-Fi network, Hotel Network, Airport network, CAMP Wi-Fi network, Shopping Mall Network and so on using MikroTik Hotspot and even can monetize your network for earning if you use Hotspot Billing Software like GalaxyRAD which is specially designed for MikroTik Hotspot network.
GalaxyRAD helps to monetize your any network providing online payment gateway as well as integrating voucher-based system. It also helps to automate your Hotspot/Captive Portal System. GalaxyRAD is a cloud-based RADIUS application and there is no need to have public IP address in your MikroTik Router if you want to integrate your Hotspot Server with GalaxyRAD. So, it is possible to integrate any network with GalaxyRAD Billing Software.
MikroTik Hotspot configuration in RouterOS 7 is so easy. Following some easy steps, we can build a captive portal network with MikroTik Hotspot Server. In my previous article, I discussed how to configure MikroTik RouterOS 7 from the very beginning. In this article, I am going to show how to configure MikroTik Hotspot in RouterOS 7.
Network Diagram for MikroTik Hotspot Network
We will configure MikroTik Hotspot Server according to the following network diagram where the MikroTik Router is acting as a Hotspot Server and an AP is being used to connect wireless devices to this Hotspot Server.
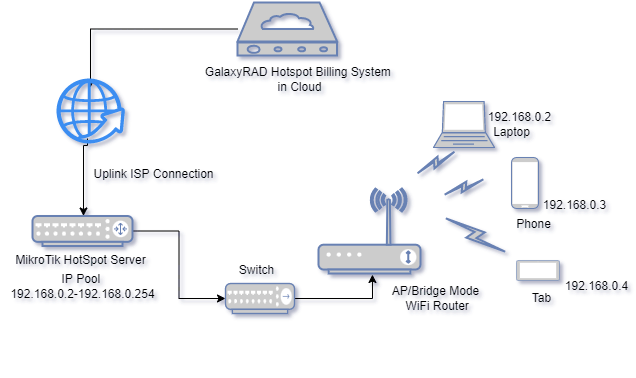
When a wireless device will be connected to this Hotspot network using network SSID, it will be redirected to the hotspot login page for authentication. Using username and password, a device can be authenticated and can get internet.
In this network, I have also shown the position of a GalaxyRAD cloud-based application. If we use GalaxyRAD Billing Software, the connected device will be redirected to the portal login page where a user can put his voucher/card number for authentication or even he/she can buy a package using online payment gateway and can use internet service automatically.
Configuring MikroTik Hotspot in RouterOS 7
Before start to configure Hotspot Server, we must have WAN configured so that MikroTik Router has internet accessibility. If you are new to MikroTik Router configuration, feel free to study MikroTik Router first time configuration guide line and then follow this article.
I hope, you have also configured your LAN gateway and LAN block. For simplicity, I am assuming the LAN gateway – 192.168.0.1/24 and the LAN interface – ether2. Hence, the LAN block will be 192.168.0.0/24.
To configure Hotspot in MikroTik RouterOS, follow the following steps.
- From Winbox, go to IP > Hotspot and then click Hotspot Setup button.
- Follow the instructions shown in the window by clicking Next button.
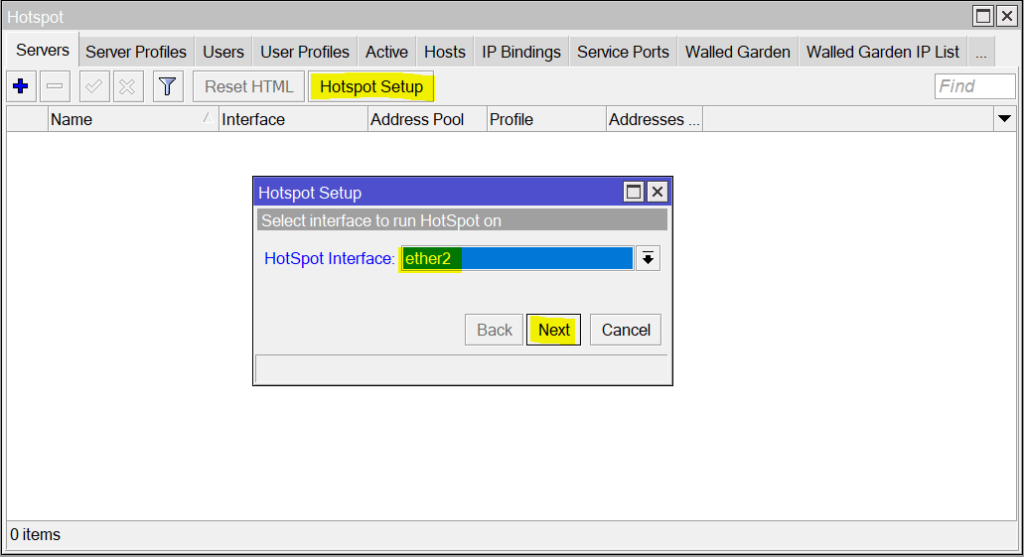
Choose the interface on which you want to setup Hotspot Server. We can install Hotspot Server on each interface of MikroTik Router. For our demo configuration, we are using ether2 port. So, choose your desired ether port and then click Next button.
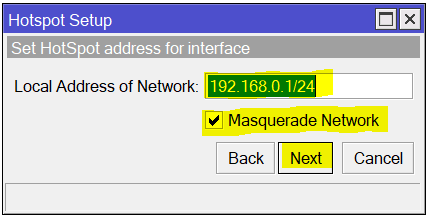
It will now ask to provide the Gateway of the Hotspot network. By default, the provided LAN gateway will be assigned and we want to keep it. So, there is no need to change. It will also keep checked the Masquerade Network. If you have not yet masqueraded this network, keep checked it otherwise uncheck it and click Next button.
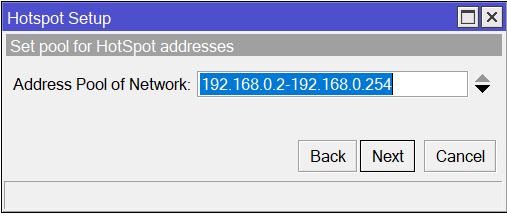
It will now ask to provide Address Pool from where users of the network will get IP address. By default, it will assign all the addresses in your LAN block without the LAN gateway. If require, can change the IP range according to your demand. Click the Next button.
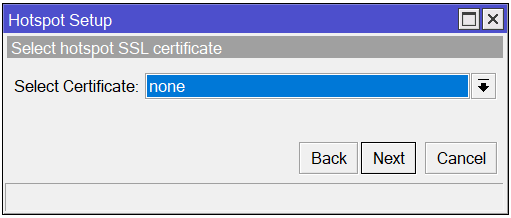
It will now ask to provide SSL certificate for your DNS Name that will be assigned in the upcoming step. For the production network, we should have an SSL certificate for our DNS Name otherwise there will arise a lot of issues. But for demo network, we can skip this step. So, click the Next button.
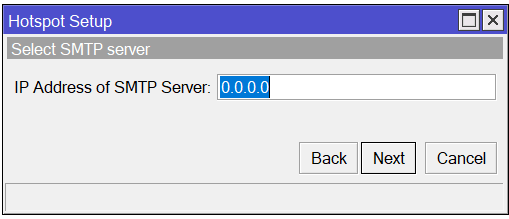
We will use no SMTP server for our Hotspot Network even we can skip this step in the production network. So, click the Next button.
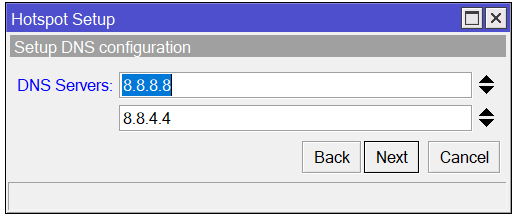
We can now provide one or more DNS Servers for our Hotspot Network. Here, we are using Google’s DNS Server for simplicity. If you have own DNS Server, can use that here. Click the Next Button.

Now it is time to provide DNS Name. For a professional Hotspot network, we should provide a valid DNS Name and should have an SSL Certificate for this DNS Name. For this demo network, I am using wifi.systemzone.net. It is my valid domain name. So, I can generate an SSL certificate for this DNS Name if a I require. Providing your DNS Name, click the Next button.
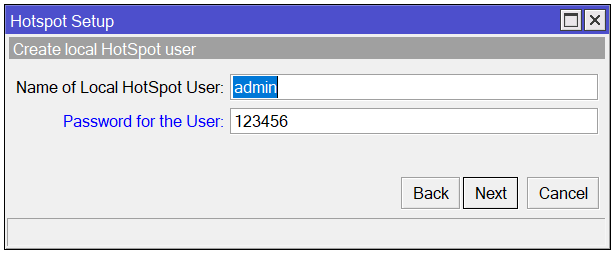
It will now ask to create the first Hotspot User that can be used to authenticate any device. For simplicity, I am providing admin and a simple password. Click the Next button.

Hotspot Setup will now be completed and you will find a successful message like the above image.
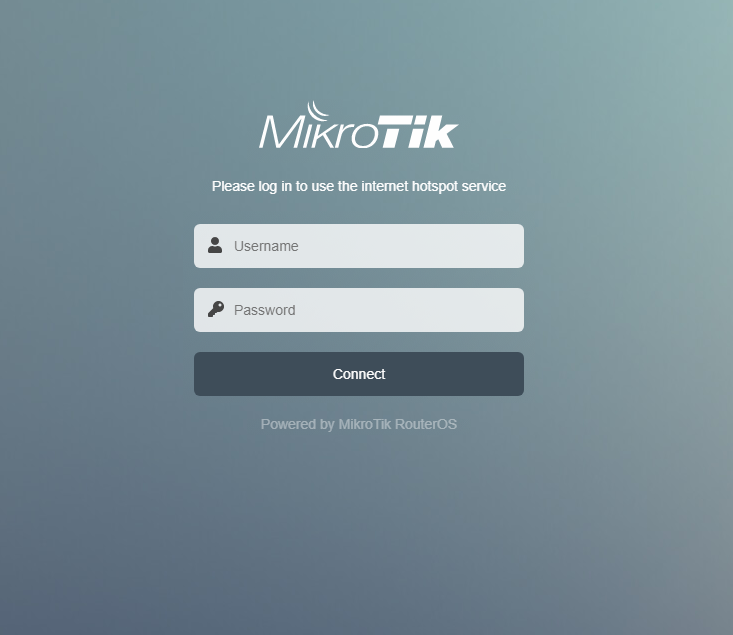
After completing Hotspot Setup, connect any device to the LAN network with RJ45 cable or connect any AP and setup SSID and then connect a Wi-Fi device. If everything is OK, you will now get the hotspot login page like the below image. If the login page does not appear automatically, browse any website without Google, Facebook and YouTube or type wifi.systemzone.net from the Browser’s URL bar.
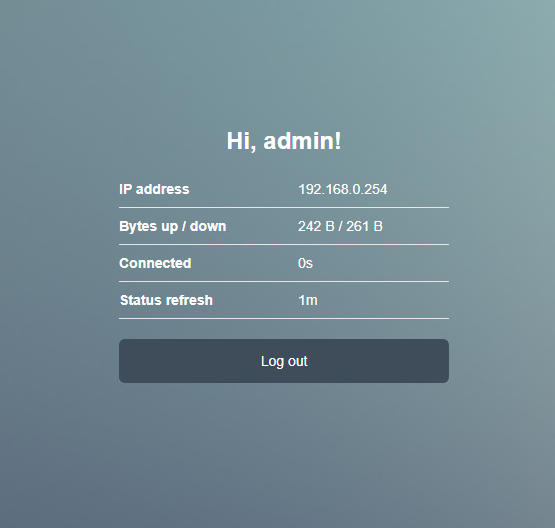
Now if we provide the admin user credentials that we created while setting up Hotspot Server, the admin user will be authenticated and can get internet access. As soon as the user will be connected, a status page will be shown showing user details like the below image.
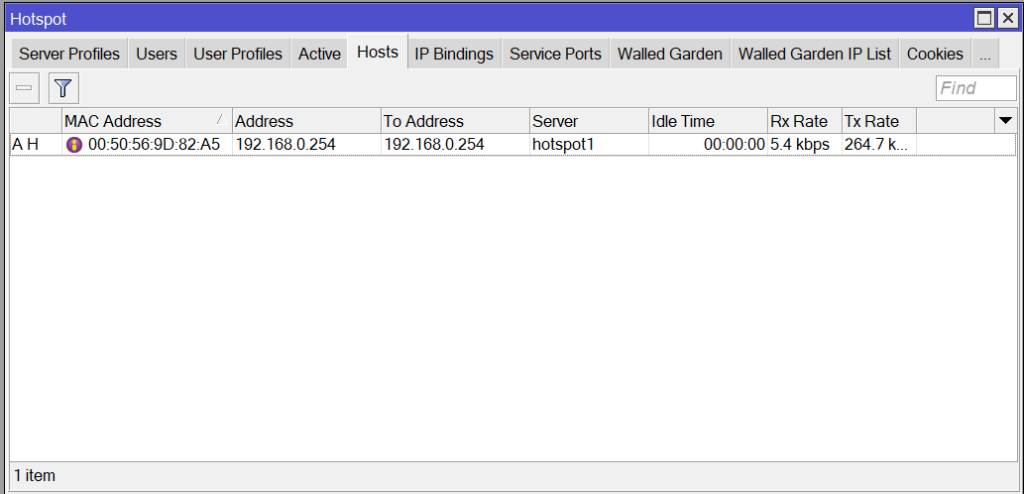
If we see the Hotspot Hosts list, we can see that the Host has been connected and an active flag will be shown at the beginning of the Host list.
So, our Hotspot configuration is done. Now create any user from Users tab and let it connect. Your desired user will now be connected and can access internet through your Hotspot Server.
This is the beginning of MikroTik Hotspot Journey. Now you can change the login template according to your business, you can apply voucher-based authentication system or even you can apply online gateway payment system to automate your Hotspot system and revenue using a powerful RADIUS based application like GalaxyRAD – WISP Automation and Billing Software.
All the necessary steps to configure Hotspot in MikroTik Router has been explained above. However, if you face any confusion, watch the following video tutorial about MikroTik Hotspot Configuration Using Winbox carefully. I hope it will reduce your confusion.
How to configure MikroTik Hotspot Server in RouterOS 7 has been discussed in this article. I hope, you will now be able to configure MikroTik Hotspot Server for your network and can run a smooth Captive Portal System. However, if you face any confusion, feel free to discuss in comment or contact me from Contact page. I will try my best to stay with you.
Why not a Cup of COFFEE if the solution?
