

MikroTik RouterOS generally logs various system events and status information. Logs are mainly saved in router’s memory (RAM) or disk. MikroTik logs can also be sent by email or even can be sent to a remote syslog server. All logs those are saved in router’s local memory can be viewed from Log menu. Any log entry that is saved in local memory contains time and date when event occurred, topics that this message belongs to and message itself. But local log information is not enough for analyzing user’s activity completely. So, if you wish to view user activity elaborately, you must use any remote syslog server. In this article, I will configure a remote syslog server named WebProxy Log Analyzer which will help to get user activity more elaborately.
WebProxy Log Analyzer Configuration
WebProxy Log Analyzer is a windows based syslog server. So, installation and configuration are hassle free and so easy. There are two end configuration for configuring a WebProxy Log Analyzer server.
- MikroTik End Configuration for sending log information to WebProxy Syslog Server.
- Webproxy Log Analyzer configuration in windows operating system.
MikroTik Configuration for Sending Log Information
MikroTik Router basic configuration and transparent web proxy configuration are prerequisites for configuring a WebProxy Log Analyzer syslog server. If you are a new MikroTik user, please spend some time to study and configure MikroTik Router Basic Configuration using Winbox and MikroTik Router Web Proxy Configuration and then continue the rest of this article.
We will now complete MikroTik Router end configurtion so that it can send log information to WebProxy Log Analyzer syslog server. Follow my below steps to complete MikroTik end configuration.
- Go to System > Logging and click on Action tab and then click on PLUS SIGN (+) to add a new action.
- Type action name what you like in Name field (example: Webproxy) and choose remote from Type drop-down menu.
- Put your Windows OS IP address (example: 192.168.20.20) where WebProxy Log Analyzer will be installed in Remote Address field. Don not change Remote Port and leave it as default port 512 and then click Apply and OK button.
- Now click on Rules tab and click on PLUS SIGN (+) to add a new logging rule.
- In New Log Rule window, choose web-proxy from Topics drop-down menu and type Prefix as you want such as Proxy and then choose the action name that you have created from step 3(here, Webproxy) from Action drop-down menu. Click Apply and OK button.
MikroTik Router side configurations has been completed. MikroTik Router will now send all Web Proxy Logs to the WebProxy Log Analyzer syslog server. So, we will now configure our WebProxy Log Catcher which will catch all the logs those will be sent by MikroTik Router.
Webproxy Log Analyzer Configuration in Windows OS
Now we will install and configure WebProxy Log Analyzer in Windows Operating System. First download WebProxy Log Setup (.exe) file from this link. After completing download, click on the (.exe) setup file to start installation and follow the instructions to complete the whole installation process and then do below steps to do general settings.
- Go to Settings > General menu.
- Enter IP address of your Windows OS (here, 192.168.20.20) that we have entered in MikroTik Router configuration, UDP Port 512 and Buffer 400.
- Write log to: Select a folder where you want to save your logs or leave it as default.
- Import from: Select a folder from where you want to import logs or leave it as default.
- DB Location: No need to change it. Leave it as default.
After few moments it will create a log file in your selected folder and WebProxy Log will be stored in this file. Now we will import this files to see log reports with WebProxy Log Analyzer.
- If you left default settings, you will see two folders are created in WebProxy Log folder. One is Current Logging where the current logs will be stored and another is Logs. Go to File > Import logs. Import Logs window will be appeared now.
- Now browse the Current Logging folder by clicking Browse button and click Import button and then click Optimize button.
- Now go to Settings > IP aliases and click Plus (+) to add a user. As soon as a row will be created. Now put user’s IP in IP address column and user’s name in Alias column and repeat this steps for all your LAN users. Alternatively, you can click From DB button and all available IP will be listed. If you don’t put user’s IP address and Alias here, you will not be able to track that user activity with WebProxy Log Analyzer.
- Now select the user whose activity you want to track from Select user drop-down menu and select date ranges from the calendar and then click Generate button to see report.
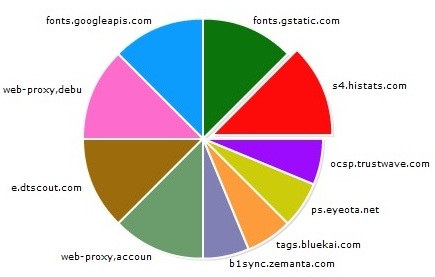
- You can also see various pie chart from the Reports menu.
WebProxy Log Analyzer installation and configuration has been completed. Now you can see your users browsing information with this log analyzer software so easily and can track your user activity.
You should follow all the above steps carefully to configure MikroTik WebProxy Log Analyzer. If you face any confusion to follow above steps, watch my be video tutorial about MikroTik WebProxy Log Analyzer configuration. I hope, it will reduce your any confusion.

MikroTik Router WebProxy Log Analyzer configuration has been explained step by step in this article. I hope, you are now able to configure a WebProxy Log server so easily. If you face any problem to configure MikroTik WebProxy Log server, please discuss in comment or contact with from Contact page. I will try my best to stay with you.