DHCP Server Configuration in MikroTik RouterOS 7
Dynamic Host Configuration Protocol (DHCP) is a client/server protocol. DHCP server automatically provides an Internet Protocol (IP) address and other related information such as subnet mask, default gateway and DNS to DHCP clients. DHCP server and client use UDP port 67 and 68 for communication.
In a network, a DHCP client (IP devices such as Desktop, Laptop, Smartphone etc.) requests for an IP lease to DHCP servers and a DHCP server responses allocating IP address and other related IP information for a certain period. So, a DHCP server reduces huge network administration tasks of a system administrator.
MikroTik RouterOS 7 has built-in DHCP service. So, system admin can easily turn MikroTik Router into a DHCP server and can easily reduce his network administration task. This article will show how to configure DHCP Server in MikroTik RouterOS 7.
MikroTik DHCP Server Configuration
MikroTik RouterOS 7 has a built-in DHCP service. So, we can easily turn our MikroTik Router as a DHCP Server. Using Winbx, we can easily configure DHCP Server in MiroTik RouterOS 7.
To configure a DHCP server in MikroTik RouterOS 7, we will follow a basic network diagram like the following image. According to the network diagram, a MikroTik Router is working as a DHCP Server and a network gateway. All the workstations either wired or wirless are DHCP Clients those are getting automatic IP information from the DHCP Server.

DHCP Enabled Network Diagram with MikroTik Router
We will now see how to configure DHCP Server in this RouterOS. But before going to enable DHCP Server in MikroTik RouterOS, we have to complete MikroTik Router basic configuration. Basic configuration means assigning WAN, LAN and Gateway IP, DNS and NATing configuration.
How to configure MirkoTik RouterOS 7 first time has been described in the previous article named MikroTik Router Basic Configuration using Winbox. So, first we have to complete the basic configuration of MikroTik RouterOS and then follow the bellow steps to enable DHCP Server in MikroTik RouterOS 7.
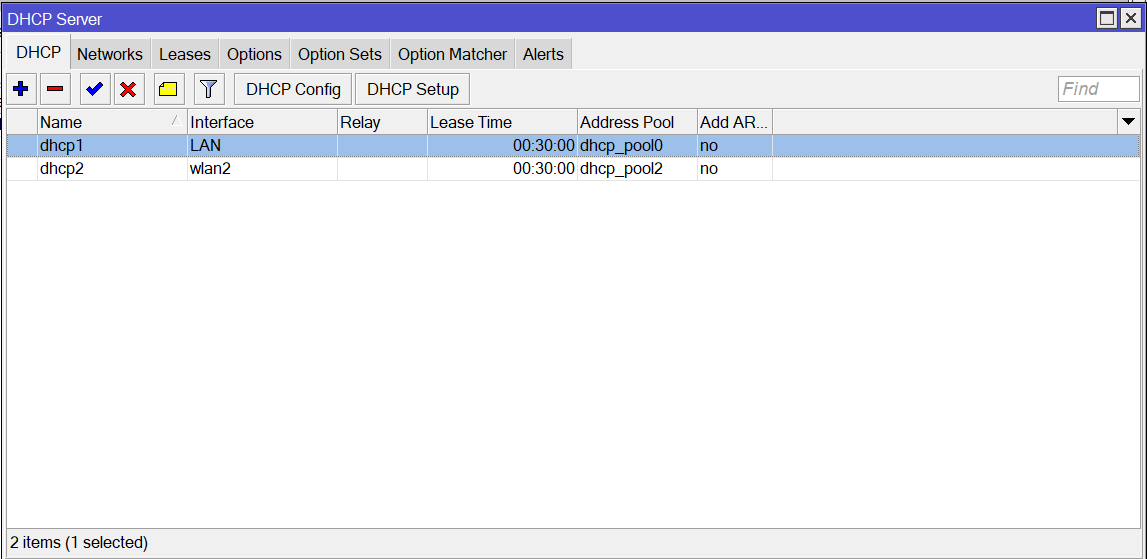
- Login to MikroTik RouterOS using Winbox and then G=go to IP > DHCP Server menu item. DHCP Server window will appear.
- InDHCP Server window, click on DHCP Setup button and choose the interface (in this article: ether2) on which we want to setup DHCP server from DHCP Server Interface drop-down menu. Click on the Next button.
- Now put the LAN IP block in DHCP Address Space input box and then click the Next button. DHCP Client will get IP from this network block.
- Put the network gateway IP in Gateway for DHCP Network input box and then click the Next button.
- Provide IP range from which DHCP client/LAN user will get IP, in Address to Give Out input box and click Next button.
- Provide preferred DNS Server IP and click the Next button.
- Now provide IP lease time and click the Next button. Default lease time is 3 days.
- DHCP setup will complete and a successful message will be shown.
MikroTik DHCP Server Setup
Now connect any IP device (Desktop, Laptop, Smartphone etc.) to the network. Automatically an IP will be allocated for that device from the MikroTik DHCP server. Click Leases tab and observe IP lease status of that DHCP client.
If you face any dificulty to enable DHCP Server in MikroTik RouterOS 7, watch the following video about DHCP Server configuration in MikroTik Router. I hope, it will help you to configure MikroTik DHCP Server successfully.
DHCP server configuration in MikroTik RouterOS 7 has been explained in this article. I hope you will be able to configure DHCP Server in MikroTik Router without any confusion. However, if you face any problem to configure a DHCP Server in MikroTik Router, feel free to discuss in comment or contact with me from Contact page. I will try to solve your issue.
Why not a Cup of COFFEE if the solution?

Thanks, brother. Your tutorials helpful and easy to understand.
asalam alikum
i want to make a DHCP Server but my ISP Provide a PPPoE Connection Please tell me how con i make it .
Thank You
For PPPoE WAN connection, Please follow this article: https://systemzone.net/mikrotik-configuration-with-pppoe-wan-connection