MikroTik RouterOS User Authentication via RADIUS Server
MikroTik RouterOS has a strong local user database that is enough to manage a single MikroTik RouterOS user. But if your network has more than one MikroTik Routers, it is always better to use a RADIUS server to manage RouterOS user centrally. MikroTik User Manager RADIUS Server is a centralized user authentication and accounting application that gives the ISP Company or network administrator ability to manage not only RouterOS users but also PPP, Hotspot, DHCP and Wireless users. How to setup MikroTik User Manager RADIUS Server has been discussed in my previous article. If you are a new MikroTik user, feel free to study that article and then keep reading this article. In this article, I will show how to authenticate MikroTik local user via User Manager RADIUS Server.
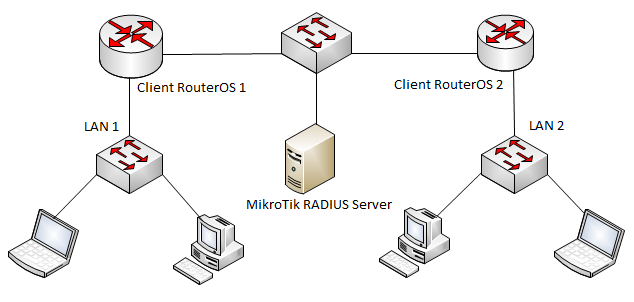
MikroTik User Manager Package can be installed and configured either on physical RouterOS or on a dedicated physical server where MikroTik RouterOS is running. I always prefer to use RADIUS Server separately. For this, I have installed User Manager Package on a dedicated physical server where MikroTik RouterOS is installed. I have also a Physical RouterOS that will work as a RADIUS client.
For this article, My User Manager RADIUS Server and Physical RouterOS contains below IP information.
- RADIUS Server IP: 192.168.110.10/29
- MikroTik RouterOS IP: 192.168.110.1/29
This information is just my RND purpose only. Change this IP information according to your network configuration.
Complete configuration for MikroTik RouterOS user authentication via RADIUS Server can be divided into two parts.
- Part 1: User Manager RADIUS Server Configuration
- Part 2: MikroTik RouterOS Client Configuration
Part 1: MikroTik User Manager RADIUS Server Configuration
In User Manager RADIUS Server, we will first add client router that will communicate with this RADIUS Server and then we will add user who will be authenticated. So, RADIUS Server configuration for RouterOS user authentication can be divided into two steps.
- Step 1: Add client router in RADIUS Server Router list.
- Step 2: Add user in RADIUS Server’s user list.
Step 1: Add Client Router in RADIUS Server Router List
Detail explanation about MikroTik User Manager RADIUS Server Routers has been discussed in my previous article. If you have any confusion about RADIUS Server Routers, first study that article and then follow below steps. The following steps will show you how to add client router in User Manager RADIUS Server.
- Login to User Manager RADIUS Server web interface with customer or subscribe credentials using https://radius-server-ip-address/userman
- Click on Routers button from left button panel and then click on Add > New menu item from top menu bar. Router Details window will appear now.
- Put a meaningful name for your client router in Name input field. Also choose owner from Owner dropdown menu.
- Put your client router IP address (in this article: 192.168.110.1) in IP address input field.
- Now provide a password in Shared secret input field. This password is important and has to provide while configuring RADIUS client in Client RouterOS.
- Click on Add button to add this router in RADIUS Server Router list.
Our client router has been added to our RADIUS Server. Now we will create user who will be authenticated by RADIUS Server.
Steps 2: Add User in User Manager RADIUS Server
Explanation about Users in User Manager RADIUS Server has been discussed in my previous article. If you feel any confusion about RADIUS user, study that article and then follow below section to add user in User Manager RADIUS Server.
Every user should have at least a user profile. So, we have to create user profile before creating a user. On the other hand, every profile may contain one or more limitations. So, before creating profile, we also need to create profile limitation. In my previous article MikroTik RouterOS User Management, I discussed that user permission level is defined by user group. In profile limitation, we will define user group that are available in Client RouterOS so that different user gets different permission level.
Create Profile Limitation in User Manager RADIUS Server
The following steps will show you how to create Profile Limitation in User Manager RADIUS Server.
- Click on Profiles button from left button panel and then click on Limitations
- Now click on Add > New menu item from top menu bar. Limitation details window will appear.
- Put a meaningful name for this limitation rule in Name input field and also choose owner from Owner dropdown menu.
- Click on Constraints panel and put group name that is available in Client RouterOS (by default full, read and write are available) and you want to assign for this profile users in Group name input field.
- Click on Add button to add this limitation in Limitations list.
Your first limitation has been created if you follow the above steps carefully. Similarly, you can create as many limitations as you want. You can also edit your created limitation using Edit menu from top menu bar.
Create User Profile in User Manager RADIUS Server
The following steps will show you how to create user profile in User Manager RADIUS Server.
- Click on Profiles button from left button panel and click on PLUS SIGN (+) button. Create profile window will appear now.
- Put a meaningful profile name in Name input filed and click on Create Your newly created profile will be available in Profile dropdown menu but there will be no limitation.
- To add limitation for this profile, click on Add new limitation Profile part window will appear now.
- From Limits panel, click on your limitation checkbox that you created before.
- Click on Add button to add this limitation to your newly created profile.
You can add as many profiles as you want following the above steps carefully. After creating limitation and profile, we will now create users who will be authenticated to login to Client RouterOS.
Create User in User Manager RADIUS Server
The following steps will show you how to create users in User Manager RADIUS Server.
- Click on Users button from left button panel.
- Click on Add > One menu item from top menu bar. User details window will appear now.
- Put username and password in Username and Password input field respectively. This username and password will be used to login to Client RouterOS. Also choose owner from Owner dropdown menu.
- From Assign profile dropdown menu, choose user profile that you created before.
- Click on Add button to add this user in user list.
A user has been created successfully in User Manager RADIUS Server. You can create as many users as you want following the above steps carefully. Similarly, you can disable, enable, change or remove any user using Edit menu.
Our User Manager RADIUS Server configuration has been completed. Now we will configure Client Router that will use RADIUS Server for user authentication.
Part 2: MikroTik RouterOS Client Configuration
In MikroTik RouterOS Client, we will configure RADIUS client so that it can communicate with RADIUS Server as well as we will enable user authentication so that it finds user from RADIUS Server. So, RouterOS Client configuration can be divided into two steps.
- Step 1: RADIUS client configuration in RouterOS
- Step 2: Enable RouterOS user authentication via RADIUS server
Step 1: RADIUS Client Configuration in MikroTik RouterOS
The following steps will show you how to configure RADIUS client in MikroTik RouterOS.
- Login to your client MikroTik Router with admin privileges using winbox software.
- Click on RADIUS menu item from left menu bar. Radius window will appear now.
- Click on PLUS SIGN (+) to add a RADIUS Server. New Radius Server window will appear now.
- Click on login checkbox from Service
- Put RADIUS Server IP address (in this article: 192.168.110.10) in Address input field.
- Put Shared secret that you have entered in RADIUS Server Routers configuration in Secret input field.
- Click Apply and OK
RADIUS client configuration has been completed. Now we will enable user authentication via RADIUS Server.
Step 2: Enable RouterOS User Authentication via RADIUS Server
The following steps will show you how to enable RouterOS user authentication via RADIUS Server.
- Go to System > Users menu item using winbox software.
- Click on AAA Login Authentication and Accounting window will appear now.
- Click on User RADIUS
- Click Apply and OK
Your client RouterOS is now ready to authenticate user via RADIUS Server. Open winbox software and login to your Client MikroTik Router using RADIUS Server user credentials. If everything is OK, you are now able to login to your Client MikroTik Router via RADIUS Server user.
Following above steps properly, you are able to configure User Manager Radius Server and MiroTik RouterOS so that Radius user can login to MikroTik Router with his credentials. However, if you face any difficulty, watch my video about MikroTik RouterOS user authentication via Radius Server. I hope it will reduce your any confusion.
How to Authenticate MikroTik RouterOS User via RADIUS Server has been discussed in this article. I hope you are now able to configure your MikroTik RouterOS so that it can be able to authenticate login user via MikroTik User Manager RADIUS Server. However, if you face any confusion to configure your User Manager RADIUS Server and Client RouterOS, feel free to discuss in comment or contact with me from Contact page. I will try my best to keep you.
Why not a Cup of COFFEE if the solution?
