How to Get Free SSL Certificate from ZeroSSL
SSL/TLS certificate is an essential part in today internet communication. Online communication cannot imagine without SSL/TLS certificate. SSL/TLS certificate makes online communication secure by encrypting data transmitted over public internet. So, most of the applications (Web, Email and VPN services) those transmit data over public internet use SSL/TLS certificate to secure communication.
SSL/TLS certificate requires to be signed by Certificate Authority (CA). It is possible to create self-signed certificate with SSL certificate creation tools such as OpenSSL. Some router venders such as MikroTik RouterOS also provide facility to create self-signed certificate. Although self-signed certificate establishes secure communication, it is always not trusted by Operating System. So, we get warning or error notification although we install private CA in trusted root certificate. For this, we need to get public CA to get warning or error free secure communication.
Public CA requires yearly subscription fee to get their service. Although this payment is not so high for enterprise organizations but small business companies sometimes face trouble to pay yearly subscription fee. Don’t be worried if subscription fee goes out of budget. Some public CA organizations provide free SSL certificate to make internet completely secure. ZeroSSL is one of them who provides fast, reliable and free SSL/TL certificate for anyone. But we need to follow some steps to get free SSL/TLS certificate from ZeroSSL. So, in this article I will show necessary steps to get free SSL/TLS certificate from ZeroSSL.
Requirements to Get Free SSL Certificate from ZeroSSL
It is so simple to get free SSL certificate from ZeroSSL but we must have the following valid information.
- A valid domain
- An admin email account
- A ZeroSSL account
So, if you have a purchased domain and hosting, create an admin email account (example: admin@example.com) and then follow this article instructions to create ZeroSSL account and to get free SSL certificate. For this article, I am using itechsheet.com domain and admin@itechsheet.com email account as example. I will create SSL certificate for mk.itechsheet.com subdomain.
Getting Free SSL Certificate from ZeroSSL
ZeroSSL provides free SSL certificate for its user. So, we have to first create a ZeroSSL account. ZeroSSL account can be created just providing email and password. So, visit ZeroSSL account creation page [https://app.zerossl.com/signup] and create an account providing valid email address and secure password.
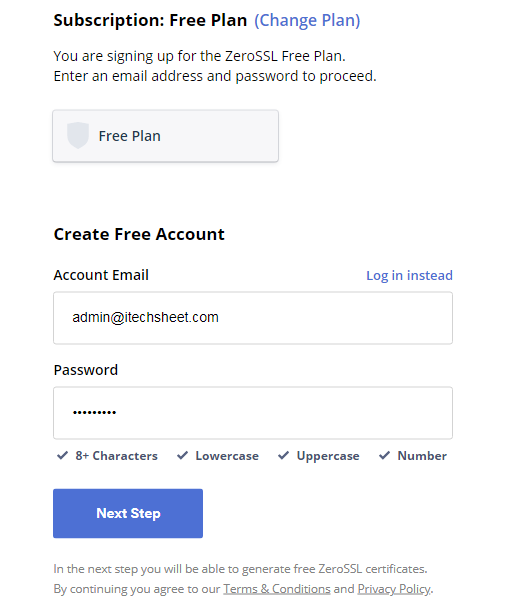
After creating account it will redirect to the account Dashboard or we can login to Dashboard from login page [https://app.zerossl.com/login].
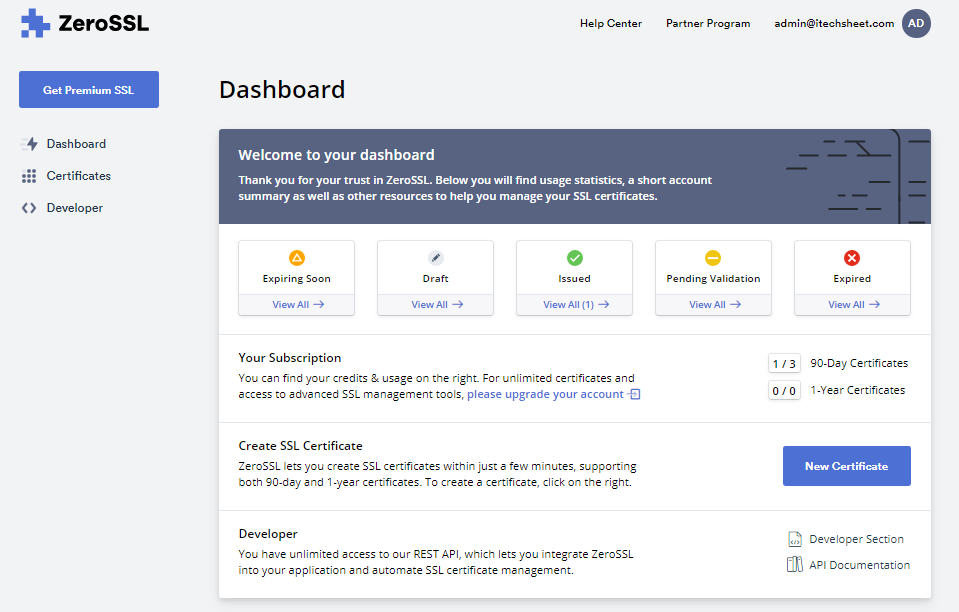
From Dashboard panel, click on Certificates menu item and then create on New Certificate button. New Certificate panel will appear.
Now put the domain or subdomain name for which you want to create SSL certificate in Enter Domains input box and then click Next Step button.

Now validity panel will appear. ZeroSSL provides free SSL certificate for 90 days but certificate can be renewed again for more 90 days when issued certificate will be expired. So, choose 90-Day Certificate and then click Next Step button.

CSR& Contact panel will appear. ZeroSSL can create CSR automatically and it is safe for us. So, choose Auto-Generate CSR and then click Next Step button.

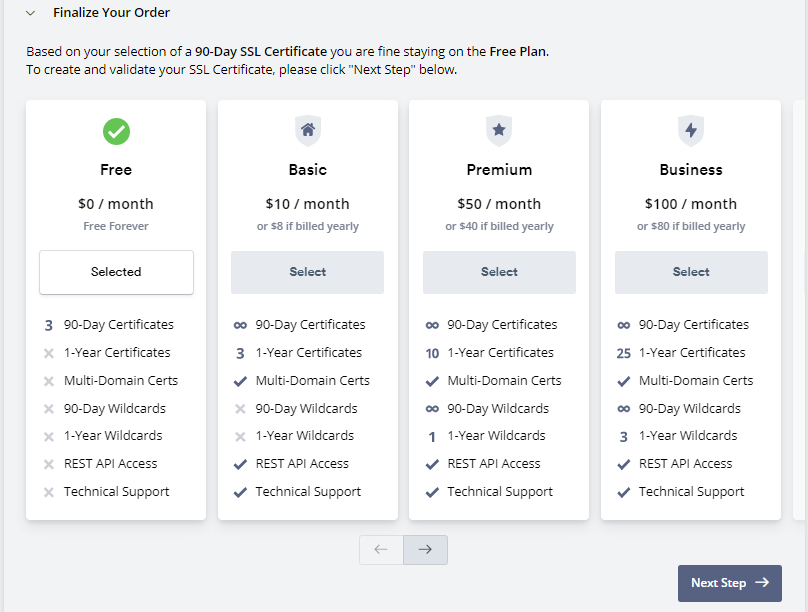
Finalize Your Order panel will appear where you will find features of selected plan. Free plan is so simple, three 90-day certificates per account and that is enough for a small business. Click Next Step button.
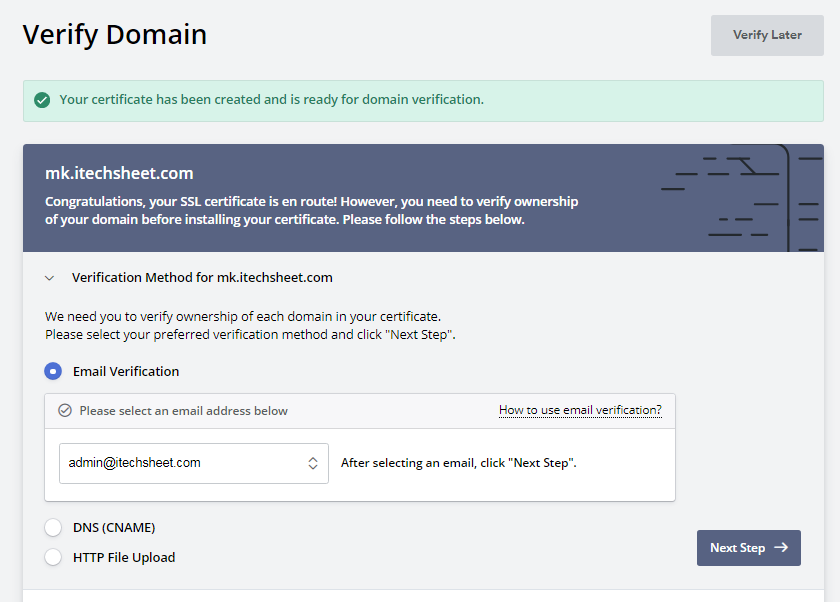
ZeroSSL will now redirect to Verify Domain page and inform that certificate has been created successfully and need to verify domain.
There are three domain verification methods in ZeroSSL. Among these, Email Verification is so simple. So, choose Email Verification option and choose admin email account (example: admin@itechsheet.com) from drop down menu and then click Next Step button.
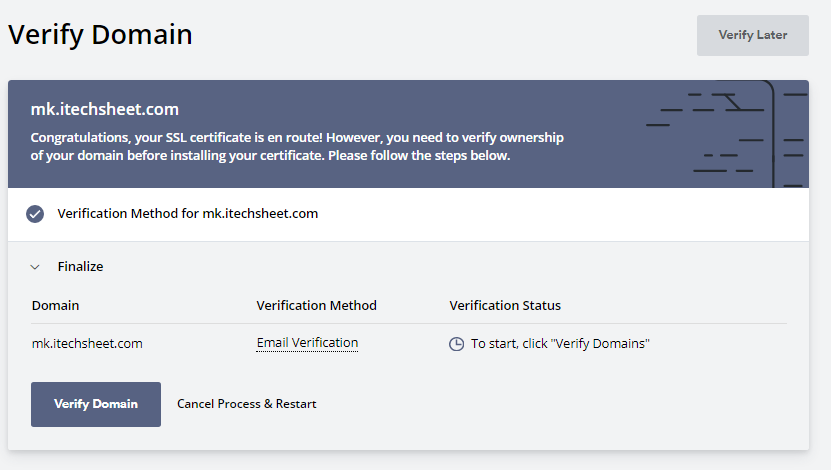
Verification method summery panel will now appear. Click Verify Domain button to send verification email.
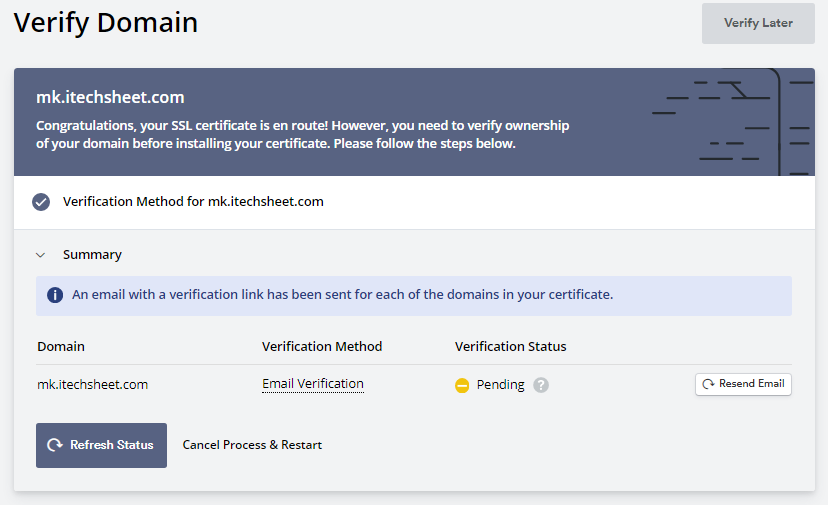
ZeroSSL will now send verification email to admin email account and it will confirm that an email has been sent and Verification Status will show Pending until we verify domain from email account.
Now we need to login to email account. ZeroSSL usually send verification email within a minute. So, login to admin email account and check verification email.
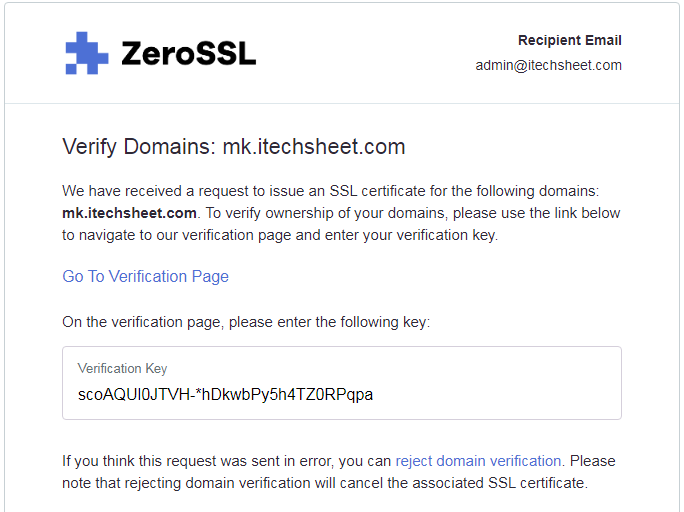
ZeroSSL will send verification page link and a verification key. So, click on Go to Verification Page link. Verification Page will now appear.
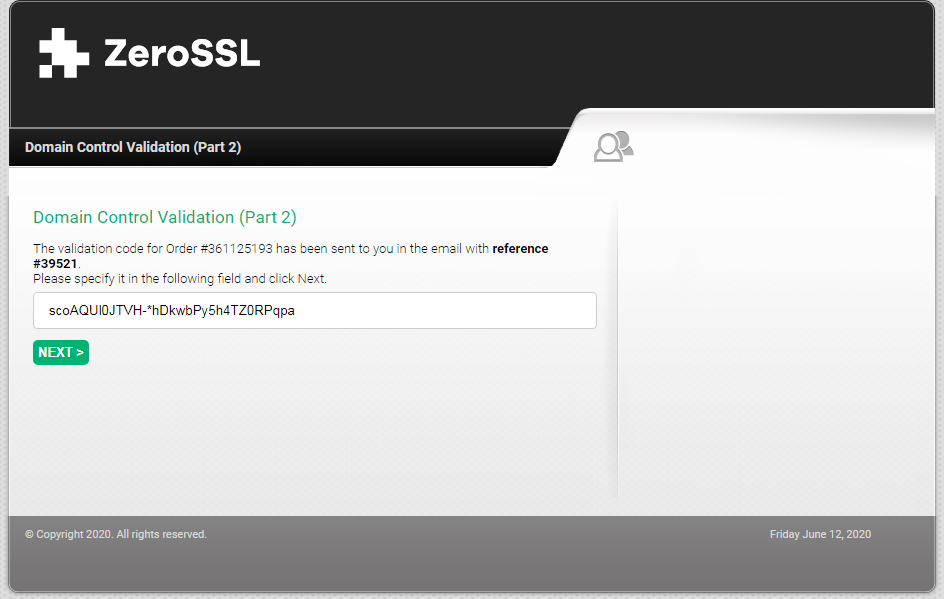
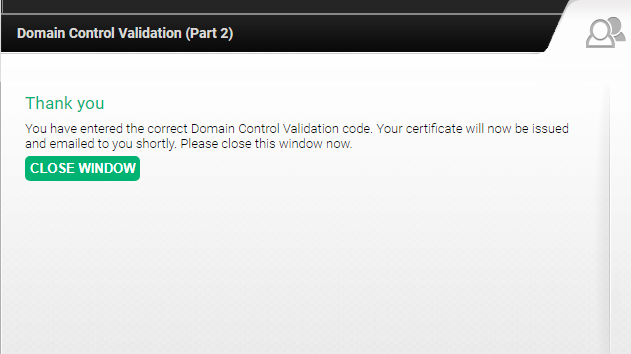
Copy Verification Key from email and paste in the appeared input box and then click NEXT button. Now verification success message will appear and ask to close the window.
Now go to Dashboard and click on Refresh Status button. Verification Status shows Verified and Install Certificate button will appear.
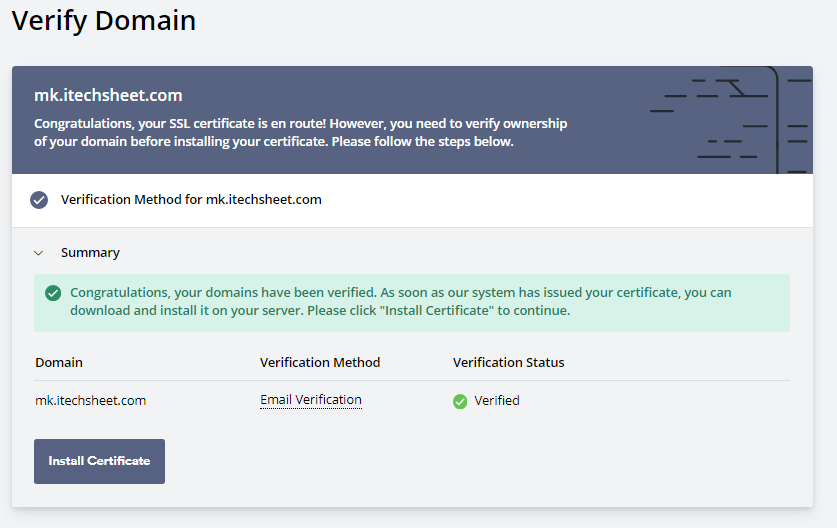
Click on Install Certificate button. ZeroSSL will now redirect to Install Certificate page and confirm that certificate has been issued and ready for installation. So, click on Download Certificate button.
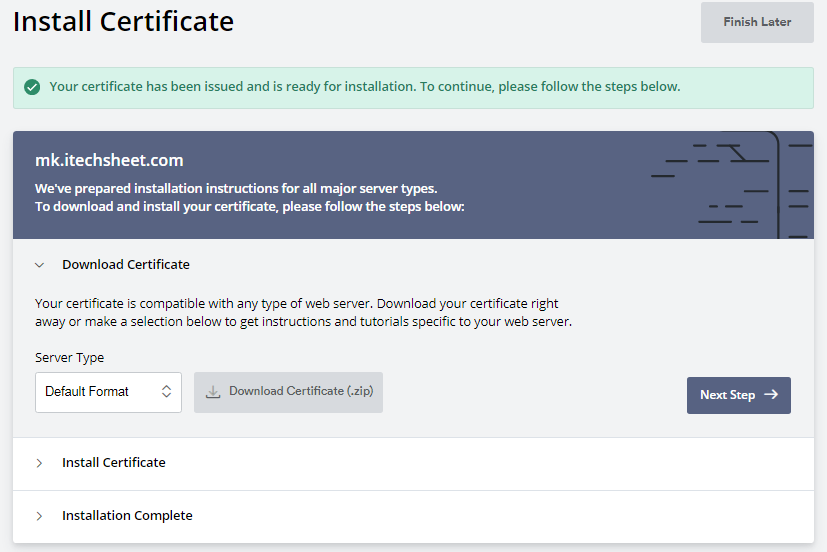
SSL Certificates will be downloaded as ZIP file in default download location. So, go to default download location of operating system and copy and paste that ZIP file in a folder where you want to save.
Now extract the ZIP file where you will find three files (ca-bundle.crt, certificate.crt and private.key) included. Rename these files according to your domain or subdomain name (example: ca-bundle.crt as ZeroSSL CA.crt, certificate.crt as mk.itechsheet.com.crt and private.key as mk.itechsheet.com.key) so that these files can distinguish easily.
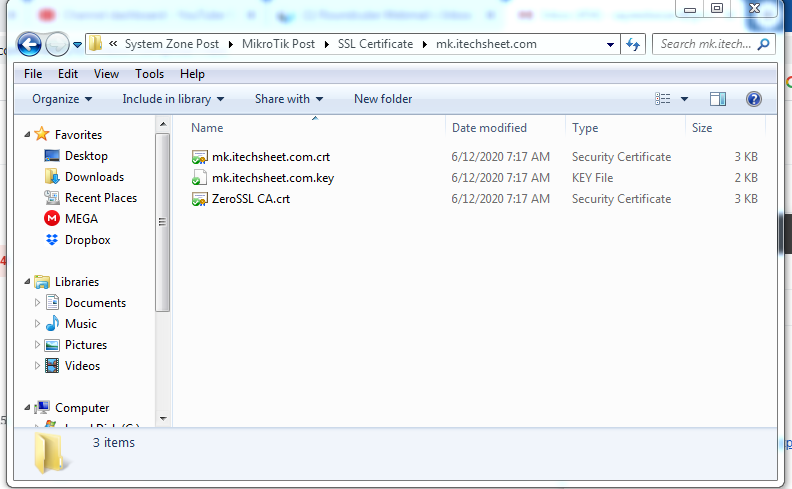
These certificate files issued by trusted Public CA (ZeroSSL) can be used any application where SSL certificate is required to make secure communication.
If you face any confusion to follow the above steps properly, watch the following video on Free SSL Certificate from Zero SSL. I hope it will reduce your any confusion.
How to Get Free SSL Certificate from ZeroSSL has been discussed step by step. I hope you will now be able to get free SSL certificate from ZeroSSL. However, if you face any confusion to get free SSL/TLS certificate, feel free to discuss in comment or contact me from Contact page. I will try my best to stay with you.
Why not a Cup of COFFEE if the solution?

