MikroTik RouterOS 7 Step by Step Configuration
MikroTik RouterOS v7 can easily be configured following the below 4 steps properly.
- Assigning WAN and LAN IP addresses
- Gateway configuration
- DNS configuration and
- NATing configuration
To configure MikroTik RouterOS, we will follow the following simple network where first interface of a MikroTik RouterBOARD is connected to an ISP network and the second interface is connected to a LAN switch where LAN PCs or devices will be connected.
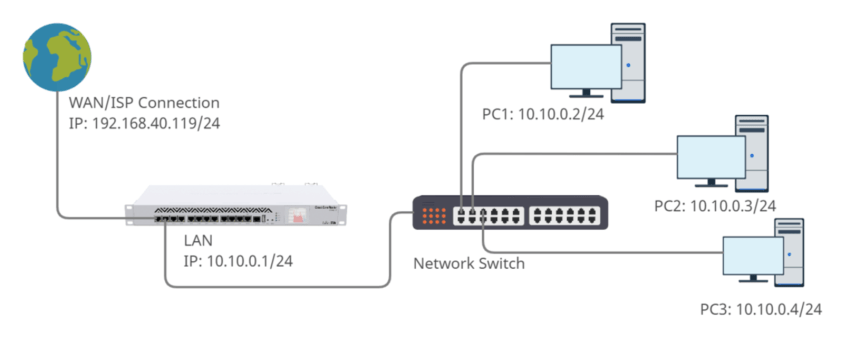
According to the above network diagram, we have the following information.
- WAN IP: 192.168.20.119/24 (This IP will be provided by your ISP)
- Default Gateway: 192.168.40.1 (This will also be provided by your ISP)
- LAN IP Block: 10.10.0.0/24 (You can assign according to your network requirement. As 10.10.0.1/24 has been assigned on MikroTik interface, it will be the default gateway of LAN devices.)
- DNS IP: We will use Google DNS IP 8.8.8.8 and 8.8.4.4 but you can use any DNS Server provided by your ISP or you can use your own DNS Server.
The above steps will be shown in the video.
