Red Hat/CentOS 7 Linux Installation (Minimal Packages)
Linux is a free and open source operating system developed by Linus Torvalds on September 17, 1991. It is mainly used as server environment. A lot of Linux distributions are present today. Among them, Red Hat Linux is used as enterprise Linux. Red Hat is also known as Red Hat commercial Linux that means Red Hat is a paid service program. CentOS (Community Enterprise Operating System) is another Linux distribution that provides a free and open source, enterprise-class, community-supported server platform functionally compatible with its upstream source, Red Hat Enterprise Linux (RHEL). All the commands and functionalities those are available in Red Hat Enterprise Linux are available in CentOS Linux. In this article, I will show how to install current version of CentOS (CentOS 7) with minimal packages.
CentOS 7 minimal installation with 7 Easy Steps
CentOS 7 can be installed with 7 easy steps if you have minimum 256MB RAM, 2GB disk space and 64 bit CPU architecture because CentOS 7 does not support 32 bit CPU architecture.
Step 1: Downloading CentOS 7 ISO and Making Bootable Drive
- First step to install CentOS 7 is to download CentOS 7 ISO image file. Go to CentOS official site centos.org and click on GET CENTOS menu link and then click on DVD ISO button. You will find a lot of download link there. Click on any link which is suitable for you and complete download.
- After completing ISO download, burn the ISO image in a DVD or in a USB flash drive with your favorite burning software and then start installation according to my below steps.
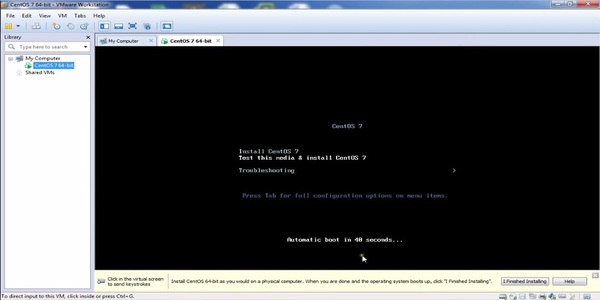
Step 2: Begin Installation
- Press power button of your machine and go to boot menu at starting. Choose your boot media CD/DVD ROM if you use DVD or USB Flash Drive if you use Pen drive as your bootable media from boot menu.
- First window of CentOS 7 installation will appear. You have nothing to do in this window. Just wait 60 seconds or press Enter key to go next window.
- It will now ask you to press Enter key to start installation. So, hit Enter key to begin installation.
- After checking a lot of system requirements a graphical window will appear to choose language and keyboard.
Step 3: Choose Language and Keyboard
From this first graphical window, choose your language and keyboard and then click on Continue button. If you wish to keep English as your server language, just click Continue button. Installation Summery window will now appear to setup Localization, Software and System.
Step 4: Localization Setup
In localization setup, there are three types of setup. Among them, Keyboard and Language Support were selected before. Now you can setup Date & Time. To setup date and time, Click on Date & Time icon.
Select your region from Region dropdown menu and select your city from City dropdown menu. You are also able to adjust your Region and City by clicking your city on the map. Your time and date will be adjusted by selecting Region and City but double check your changed date and time below the map and then click on the Done button.
Step 5: Software Setup
In software setup, there are two options. These are Installation Source and Software Selection. Installation source will be automatically selected as Local Media. If you want, you can change it. Minimal Install will be selected in Software Selection option. As we are installing basic CentOS 7, we will keep Minimal Install and we will do nothing here. But if you want, you can choose more software options by clicking Software Selection option.
Step 6: System Setup
There are two options in System setup. These are Installation Destination and Network & Hostname. We will configure network and hostname in our future tutorial with command. So, we will do nothing in network and hostname configuration. But we will configure Installation Destination now according to below steps.
- Click on INSTALLATION DESTINATION Installation Destination window will appear.
- In Device Selection area click on disk icon which is shown within Local Standard Disks
- From Other Storage Options, click on I will configure partitioning radio button and click on Done
- Manual Partitioning window will appear now. Click on dropdown menu within New CentOS 7 Installation box and choose Standard Partition
- Now click on PLUS SIGN (+) located below New CentOS 7 Installation ADD A NEW MOUNT POINT pop up window will appear. Choose /boot option from Mount Point dropdown menu and type 500 in Desired Capacity input box. By default, MB will be the unit of capacity if you do not mention it. Click on Add Mount Point button now.
- Similarly click on PLUS SIGN again and choose swap from Mount Point dropdown menu and put desired capacity equal to your RAM size in Desired Capacity input box. For example, if your RAM size is 1GB, put capacity value 1GB. Click on Add Mount Point
- Again click on PLUS SIGN and choose (/) root partition from Mount Point dropdown menu and put your desired root partition value in Desired Capacity input box. If you wish to assign 10GB for your root partition, put value as 10GB but it must be less than or equal to total disk space-(/boot+swap). Click on Add Mount Point
- Click on Done button and then click on Accept Changes button in SUMMARY OF CHANGES window.
- Now click on Begin Installation CentOS 7 will start installation according to your desired configuration.
Step 7: Root Password and User Creation
While installing required services, you have to provide Root Password and optionally you can create another local user in this time. To provide root password, click on Root Password option from USER SETTINGS area. Now provide root password in Root Password input box and confirm your password by typing again in Confirm input box and then click on Done button. If you wish to create a local user, click on USER CREATION option and provide necessary information.
Now wait till it will finish required packages installation. At the last, it will show a complete message and ask you to reboot your system. After rebooting a command prompt will appear. Provide login name root and your root password. You are now able to login in your CentOS system if everything is OK and can apply various commands in this command prompt.
If you face any confusion to follow above steps properly, watch my below video tutorial about Red Hat 7/CentOS 7 installation. I hope it will reduce your any confusion.
CentOS 7 minimal installation has been shown in this article. I hope you are now able to install CentOS 7 in your physical server successfully. However, if you face any problem to install CentOS 7, feel free to discuss in comment or contact with me from Contact page. I will try my best to stay with you.
Why not a Cup of COFFEE if the solution?

Good starting on Redhat Linux